Why Choosing the Right Room for a Mini Split System Changes Everything
The best rooms for a mini split system are bedrooms, home offices, living rooms, converted garages, finished basements, sunrooms, and room additions — spaces where targeted, independent climate control makes the biggest difference in everyday comfort.
Quick Answer: Best Rooms for a Mini Split System
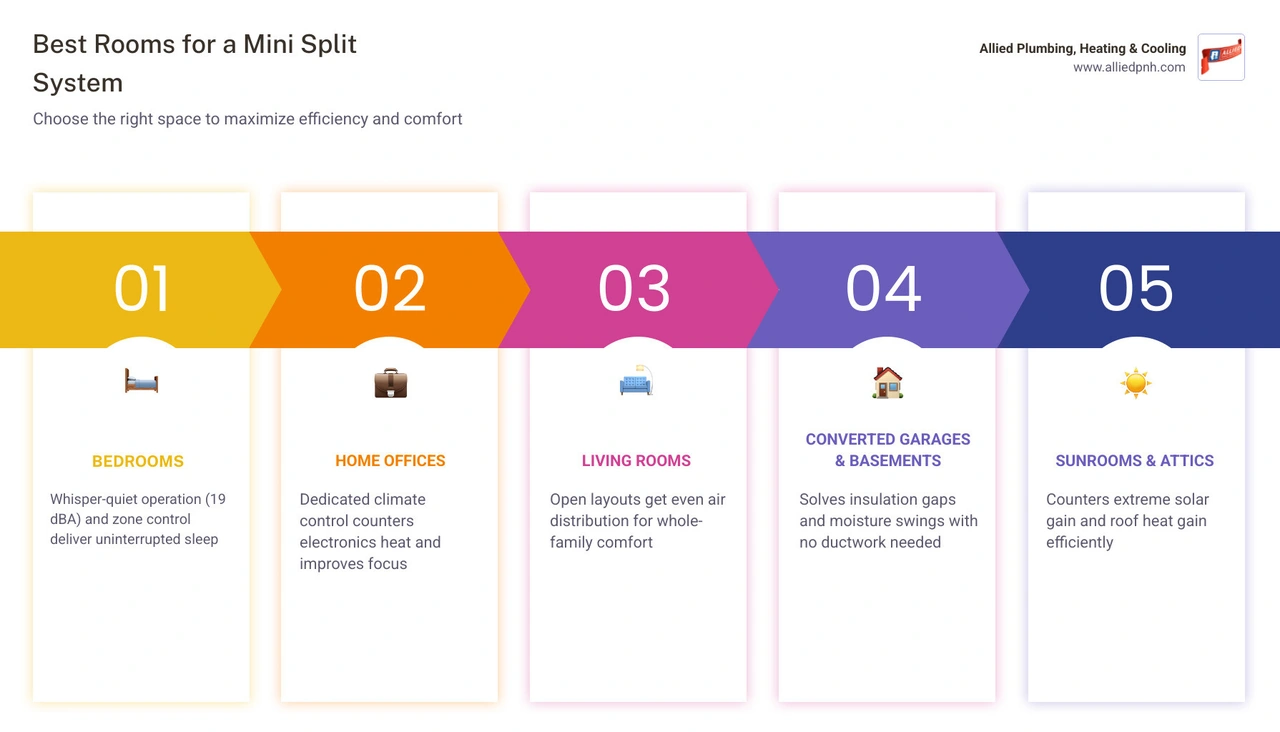
• Bedroom — Why It Works: Whisper-quiet operation; personal temperature control
• Home Office — Why It Works: Manages heat from electronics; boosts focus
• Living Room — Why It Works: Larger open space benefits from even air distribution
• Converted Garage — Why It Works: No existing ductwork; insulation challenges solved
• Finished Basement — Why It Works: Addresses moisture and temperature swings
• Sunroom / Attic — Why It Works: Fights extreme heat from solar gain and roof exposure
• Room Addition — Why It Works: No duct connection to main system
Not every room is a good fit, though — and placing a unit in the wrong spot can quietly drain efficiency and comfort without you ever knowing why.
Here is the thing most homeowners don't realize: choosing which room gets a mini split is only half the decision. Where inside that room the unit goes matters just as much. A poorly placed unit — even in the right room — can lose up to 20% of its efficiency according to industry data. Meanwhile, traditional ducted systems already lose 20% to 30% of conditioned air to leaky ductwork before it ever reaches you.
Mini splits sidestep that problem entirely. But they introduce their own set of placement rules that are easy to get wrong. This guide walks you through the best rooms in Springfield, Rochester, and Chatham homes for a mini split installation, the indoor and outdoor placement guidelines that actually move the needle, and the common mistakes that quietly undermine performance from day one.
Why Room Selection and Placement Matter for Efficiency
When you install a ductless system, you are bypassing the complex web of metal ductwork running through your attic or crawlspace. While this eliminates the massive thermal losses associated with traditional ducts, it places a heavy emphasis on how air moves within the specific room itself.
Airflow is the lifeblood of a ductless system. Unlike central HVAC systems that push high-velocity air through multiple registers, a mini split relies on a single indoor air handler to intake warm air from the top of the room, condition it, and gently distribute it back out into the living space.
[Warm Air Intake (Top of Unit)] │ ┌───────▼───────┐ │ Mini Split │ └───────┬───────┘ │ [Cool Air Outflow (Directed Down)]
If the unit is placed in a tight corner, behind tall furniture, or too close to the ceiling, the cycle is disrupted. The air handler will end up drawing in the newly conditioned air it just released rather than the actual warm air in the room. This phenomenon is known as short-cycling.
When a unit short-cycles, the internal thermostat sensor thinks the room has reached the desired temperature and shuts the compressor down prematurely. The result? A room that remains humid and unevenly cooled, accompanied by a spike in your energy bills because the compressor is constantly turning on and off.
Understanding how these units interact with your home's layout is key to maximizing your investment. To get a complete picture of how these systems operate, read our comprehensive overview on Ductless Mini-Split Systems Explained.
The Best Rooms for a Mini Split System: A Room-by-Room Guide
Ductless systems shine brightest when they are deployed to solve specific comfort problems. In Springfield, Rochester, and Chatham, our seasons bring everything from humid summer afternoons to freezing winter nights. Traditional single-zone central systems often struggle to keep up, leaving some rooms feeling like iceboxes while others mimic greenhouses.
If you are trying to resolve temperature imbalances in your home, you can read about how to Solve Uneven Cooling with Ductless AC. Let's take a closer look at the spaces that benefit most from a dedicated mini split system.
Bedrooms: The Best Rooms for a Mini Split System to Ensure Quiet Sleep
We spend roughly a third of our lives sleeping, making the bedroom one of the most critical zones for precise temperature control. Many two-story homes in Springfield, Rochester, and Chatham suffer from "second-floor syndrome," where bedrooms stay uncomfortably warm long after the sun goes down because heat naturally rises.
A mini split in the master bedroom or a guest suite allows you to set your perfect sleeping temperature without cooling the entire house. Best of all, modern ductless indoor units operate at sound ratings as low as 19 dBA. To put that in perspective, a normal conversation is about 60 decibels, and a quiet whisper is around 30 decibels. A mini split is literally quieter than a whisper, ensuring your sleep remains completely undisturbed.
Home Offices: Boosting Productivity with Dedicated Climate Control
With remote work firmly established in 2026, the home office has become a high-priority zone. Home offices are unique because they contain heat-generating electronics — computers, monitors, printers, and backup power supplies — that raise the ambient temperature of the room.
Trying to cool a home office with a central thermostat often results in over-cooling the rest of the house just to make your workspace bearable. A dedicated mini split keeps your workspace at a crisp 72 degrees while the rest of the house remains at a energy-saving 78 degrees, keeping your focus sharp and your productivity high.
Converted Garages and Finished Basements: Reclaiming Unused Spaces
Garages and basements are notorious for their lack of insulation and connection to central ductwork. If you have converted your garage into a home gym, workshop, or playroom, a traditional HVAC system simply cannot extend its reach there safely or effectively.
Basements present a different challenge: moisture. Because they are surrounded by earth, basements naturally stay cooler but suffer from high relative humidity. Mini splits feature highly effective dehumidification modes ("dry mode") that pull moisture out of the air while maintaining a comfortable temperature, transforming a damp basement into a cozy family room. If you are debating between extending central air or going ductless for these unique spaces, check out our guide on Central Air vs. Mini-Split for Older Homes.
Sunrooms and Attics: Taming Extreme Temperature Swings
Sunrooms are beautiful, but their extensive glass walls create a powerful greenhouse effect. By noon, a sunroom can become completely unusable due to intense solar heat gain. Attics and bonus rooms over garages face similar struggles, sitting directly beneath hot roof decks and often running 5 to 10 degrees warmer than the rest of the home.
A mini split system provides the raw cooling capacity needed to offset this intense heat load. This allows you to enjoy your sunroom or attic bonus space comfortably in July and August without placing a massive burden on your main heating and cooling system.
Indoor Placement Rules: Best Practices and Locations to Avoid
Once you have identified the best rooms for your system, you must determine exactly where on the wall the indoor unit should live. Proper physical placement ensures your system operates at peak efficiency for years to come. For a deeper dive into physical placement strategies, explore our guide on Where to Place Your Mini-Split Units.
The 6-Inch Rule and Wall Clearance
Mini splits pull air in from the top of the unit. Because of this, they require a physical gap between the top of the chassis and the ceiling.
• The 6-Inch Rule: Always maintain at least 6 inches of clearance between the top of the indoor unit and the ceiling. Leaving less than this restricts return airflow, dropping system efficiency by up to 30%.
• Mounting Height: For standard 8-foot ceilings, the unit should be mounted approximately 7 feet from the floor. This provides the perfect balance of easy filter access and optimal air distribution, allowing cool air to naturally sink through the living space.
Perimeter Walls vs. Interior Walls
Whenever possible, we recommend mounting indoor units on an exterior (perimeter) wall.
• Simplified Drainage: Mini splits produce water (condensate) as they dehumidify. When mounted on an exterior wall, the condensate drain line can run directly through the wall to the outside via gravity.
• Interior Wall Challenges: If you must mount on an interior wall, the drain line has to run through the attic, crawlspace, or inside the wall cavity. This often requires a small, motorized condensate pump to push the water upward. These pumps add mechanical complexity, require maintenance, and can introduce a soft clicking noise to the room.
Kitchens and Bathrooms: Grease and Humidity Hazards
While it might be tempting to put a mini split in a hot kitchen or a damp bathroom, these are two of the absolute worst locations for an indoor air handler.
• The Kitchen Grease Trap: Kitchen air is filled with vaporized grease and steam from cooking. This grease quickly coats the indoor unit's delicate air filters and fan wheel, creating a sticky trap for dust that is incredibly difficult to clean and can permanently damage the motor.
• Bathroom Humidity: High-humidity environments like bathrooms can overwhelm the unit's condensate pan, leading to water dripping down your walls. Additionally, local electrical codes often restrict HVAC installations in wet zones.
To learn more about selecting the right physical hardware for tricky spaces, see our article on Choosing a Ductless AC System for Your Space.
Hallways: Why Narrow Corridors Are Not the Best Rooms for a Mini Split System
One of the most common mistakes we see homeowners make is trying to cool three bedrooms by placing one large mini split in a shared hallway. We call this the "Ghost Trap."
[ Hallway Mini Split ] │ ┌───────────────▼───────────────┐ │ Cold Air Sinks in Hallway │ └───────┬───────────────┬───────┘ ▼ ▼ [Closed Door] [Closed Door] │ │ [Hot Bedroom] [Hot Bedroom]
Because hallways are narrow, dead-end spaces, the cold air released by the unit has nowhere to go. It quickly pools in the hallway, lowering the temperature in that small corridor almost instantly. The unit's thermostat detects this drop and shuts down, leaving the adjacent bedrooms completely untouched and still hot. One unit in a hallway will not effectively cool multiple rooms with closed doors.
Outdoor Unit Placement and Sizing Guidelines
The outdoor condenser is the muscle of your mini split system. It is responsible for releasing the heat pulled from your home during the summer and gathering heat from the outdoor air during the winter.
Outdoor Condenser Placement for Peak Performance
To ensure your outdoor unit runs smoothly:
• Shade Matters: Placing your outdoor unit in direct, intense sunlight can increase its energy consumption by up to 10%. Try to install it on the north or east side of your home where it can benefit from natural afternoon shade.
• Clearance Requirements: The outdoor unit needs at least 12 to 24 inches of clear, unobstructed space on all sides. Avoid placing it behind dense shrubbery, under low decks, or in tight alleyways where air cannot circulate freely. Blocked airflow can cut system efficiency by 15% or more.
• Level Surfaces and Vibration: The unit must be mounted on a flat, stable pad or secured to the side of the home with heavy-duty brackets. Using rubber vibration pads under the feet of the condenser prevents operational hums from echoing through your home's structure.
Sizing Your Mini Split: Beyond Square Footage
Sizing a mini split isn't as simple as matching square footage to a basic sizing chart. While a general rule of thumb is 20 BTUs per square foot for cooling, several critical adjustments must be made:
1. Ceiling Height: Standard calculations assume 8-foot ceilings. If your room has 10-foot ceilings, add 25% to your BTU target. For 12-foot or vaulted ceilings, add 50%.
2. Sun Exposure: If the room faces south or west and has large windows, add 10% to 20% to the capacity to handle the solar heat gain.
3. Insulation Quality: For poorly insulated spaces, older historic homes in Springfield, or converted garages, increase your BTU capacity by 20% to 40% to compensate for thermal loss.
4. Kitchen Exception: If you are installing a unit in an open-concept space near a kitchen, add a flat 4,000 BTUs to account for heat generated by stoves and ovens.
Frequently Asked Questions About Mini Split Placement
Can one mini split unit cool multiple rooms?
A single traditional wall-mounted indoor unit is designed to condition the specific room it is installed in. Because air does not easily travel around corners or through narrow doorways, a single head cannot effectively cool multiple separated rooms. For homes with multiple rooms needing climate control, a multi-zone system is the ideal solution. This setup connects up to five indoor air handlers to a single, powerful outdoor condenser, allowing each room to have its own independent thermostat.
How high should a mini split indoor unit be mounted?
For standard 8-foot ceilings, the indoor unit should be mounted between 7 and 7.5 feet from the floor, leaving at least 6 inches of clearance below the ceiling. If you have high or vaulted ceilings, try to keep the unit mounted around 8 feet high. Mounting it any higher can make filter cleaning difficult and can cause the warm air rising to the top of the ceiling to throw off the unit's thermostat sensor.
Do mini splits require a dedicated electrical circuit?
Yes. For safety and compliance with local electrical codes in Springfield, Rochester, and Chatham, every mini split system requires a dedicated 240-volt electrical circuit. Running a mini split on a shared household circuit can overload your electrical panel and poses a serious safety hazard.
Conclusion
Choosing the best rooms for a mini split system and nailing the physical placement of the indoor and outdoor units is the difference between a system that runs flawlessly and one that struggles to keep up. By focusing on high-need rooms like bedrooms, offices, and converted spaces, and following strict placement guidelines, you can enjoy whisper-quiet, highly efficient comfort all year long.
At Allied Plumbing, Heating & Cooling, we have been serving our neighbors in Springfield, Rochester, and Chatham since 1977. As a third-generation family business, we take pride in our work. We back our ductless installations with the Daikin Comfort Promise and industry-leading 12-year warranties, giving you ultimate peace of mind.
Don't leave your comfort to chance. Schedule your Springfield mini split consultation today! and let our experienced team help you design the perfect zoned comfort system for your home.


