


Why Your HVAC System Depends on Clean Air Filters
Air filter replacement is a crucial maintenance task. A clean filter ensures your HVAC system runs efficiently, protecting your family’s health and preventing costly repairs.
Quick Air Filter Replacement Guide:
- Turn off your HVAC system at the thermostat and breaker.
- Locate the filter slot near the air handler or in a return duct.
- Remove the old filter and note the airflow arrow’s direction.
- Insert the new filter with the arrow pointing toward the unit.
- Restore power and test your system.
Your air filter is the first line of defense for your HVAC system, trapping dust, pollen, and other particles. When a filter clogs with debris, your system works much harder to circulate air.
This extra strain leads to three major problems:
- Higher energy bills: Your system can use up to 15% more energy with a dirty filter.
- Poor indoor air quality: Allergens and pollutants circulate through your home.
- Expensive repairs: Components wear out faster under added stress.
Many Springfield homeowners don’t realize a simple filter change can prevent costly breakdowns and improve air quality. The good news is that replacing your filter takes only a few minutes and requires no special tools.

When to Replace Your Air Filter: Key Signs and Timelines
A clogged air filter hurts your HVAC system’s performance, increases energy bills, and fills your home with dust and allergens. Your system will often give you signs when it needs a new filter; you just have to know what to look for.
Telltale Signs Your Filter Needs Changing
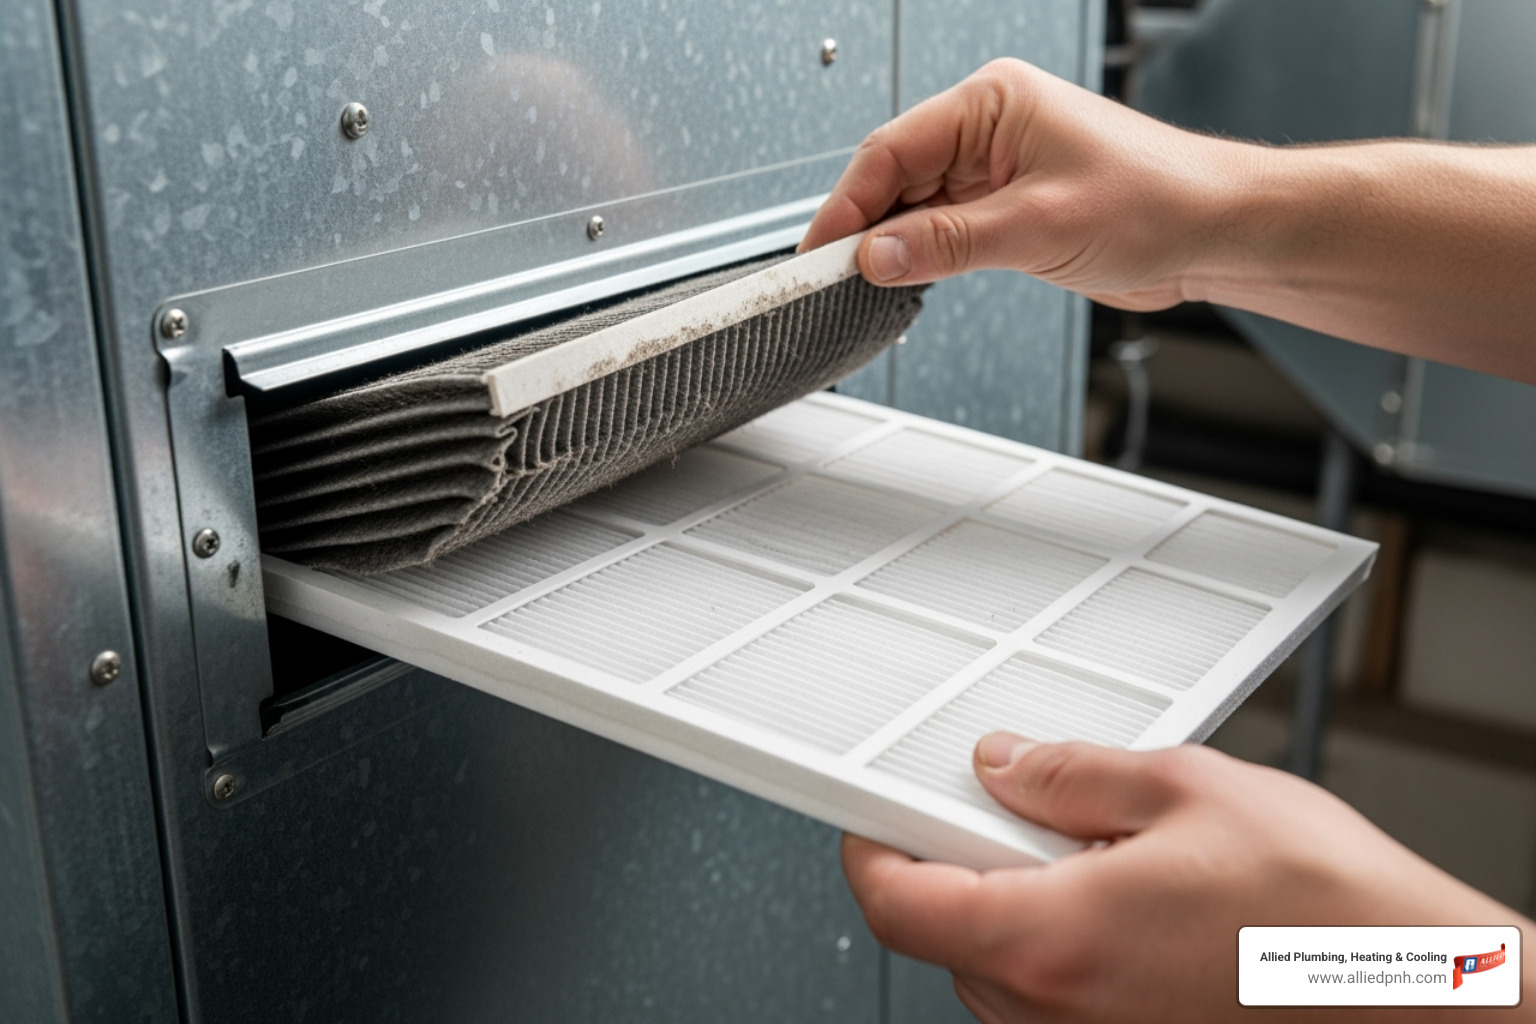
- Visual Inspection: The easiest check. If the filter is caked in a thick layer of dust and grime, it’s time for a change. You should be able to see light through a clean filter.
- Decreased HVAC Performance: Weak airflow from vents or a system that runs constantly without reaching the set temperature are common symptoms. A clogged filter is one of the most common reasons your AC may run but not cool your home.
- Increased Energy Bills: Your system uses up to 15% more energy when forcing air through a dirty filter. This extra effort shows up on your utility bill.
- Dust Accumulation: If you’re dusting more often, your filter is likely full and can no longer trap airborne particles effectively.
- Musty Odors: A dirty filter can harbor mold and bacteria, causing unpleasant smells when your system turns on.
General Replacement Frequency
Filter lifespans vary by type. Start with the manufacturer’s recommendation and adjust based on your home’s needs.
- Fiberglass filters: Replace every 30 days. These are basic filters that primarily protect your equipment.
- Pleated filters: Last up to 90 days. They offer a good balance of filtration and airflow for most homes.
- High-efficiency filters (MERV 13+): Can last 6-12 months, but their high resistance can strain some residential systems. Check your system’s compatibility before upgrading.
Factors That Affect Replacement Frequency
Your specific environment plays a huge role in how often you’ll need to perform an air filter replacement.
- Household Pets: Pet dander and hair clog filters quickly. With pets, plan to change your filter every 60 days.
- Allergies: To maintain better indoor air quality, change your filter every 45-60 days if anyone in your home has allergies or asthma.
- Number of Occupants: More people mean more activity and dust. Busy households should stick to the shorter end of replacement schedules.
- Local Air Quality: Proximity to construction, busy roads, or areas with high pollen or wildfire smoke means more frequent changes are necessary.
- Smokers in the Home: Tobacco smoke clogs filters rapidly and requires more vigilant replacement.
A Simple Guide to HVAC Air Filter Replacement
Performing an air filter replacement is one of the easiest and most impactful DIY maintenance tasks you can do. It takes just a few minutes and requires no special tools. Follow these steps to do it safely and effectively.
Step 1: Gather Your Tools and the Right Filter
Having the right supplies on hand makes the job quick and easy.
- Your New Filter: Getting the correct size is essential. The dimensions (e.g., “20x25x1”) are printed on the side of your old filter. If not, check your HVAC manual or measure the filter slot.
- A Marker (optional): Use it to write the installation date on the new filter’s frame as a reminder.
- Gloves (optional): A pair of gloves is helpful for handling a dirty filter.

Step 2: Locate the Filter and Turn Off Your System
Safety first! Always power down your HVAC system before changing the filter.
- Turn off the thermostat: Set it to the “off” position for both heating and cooling.
- Turn off the breaker: For complete safety, flip the circuit breaker for your HVAC system to the “off” position.
- Locate the filter slot: Air filters are usually located either near the indoor air handler (in a closet, basement, or attic) or inside a large return air vent on a wall or ceiling.

Step 3: Perform the Air Filter Replacement
Now it’s time to swap the old filter for the new one.
- Remove the old filter: Unlatch the cover of the filter slot and carefully slide the old filter out.
- Note the airflow arrow: Look for an arrow on the filter’s frame. This indicates the direction air should flow. The arrow must always point towards the furnace or air handler.
- Clean the housing (optional): Use a cloth or vacuum to quickly clean any dust from inside the filter housing.
- Insert the new filter: Slide the new filter in, making sure the airflow arrow points in the correct direction. Ensure it fits snugly to prevent air from bypassing the filter.

Step 4: Close Up and Restart Your System
You’re almost done!
- Replace the cover: Secure the cover or latches on the filter slot.
- Restore power: Flip the HVAC circuit breaker back to the “on” position.
- Test your system: Turn your thermostat back on. You should hear the system start up and feel conditioned air from the vents. Congratulations, you’ve just improved your system’s efficiency and your home’s air quality!
Choosing the Perfect Air Filter for Your Home
Choosing the right filter means finding the perfect balance between filtration and airflow for your HVAC system. A filter that’s too restrictive can strain your equipment, while one that’s too coarse won’t clean the air effectively.
Understanding Air Filter Types
- Fiberglass Filters: These disposable filters are the most affordable option. They do a good job of protecting your HVAC equipment from large debris like dust and hair but are less effective at capturing smaller allergens.
- Pleated Filters: The most common choice for homeowners, these disposable filters use an accordion-like design to trap more particles like pollen, dander, and mold spores. They offer a great balance of performance and price.
- Electrostatic/Reusable Filters: These filters use static electricity to attract particles and can often be washed and reused. While environmentally friendly, they require regular cleaning to remain effective.
Decoding MERV Ratings for Your Air Filter Replacement
The MERV (Minimum Efficiency Reporting Value) rating, from 1 to 16, tells you how effective a filter is at trapping airborne particles. Higher numbers mean finer filtration. For more details, you can consult the EPA’s guide to air filters.
- MERV 8: A good choice for most homes, capturing common particles like dust and pollen without restricting airflow too much.
- MERV 11: A better option for homes with pets or mild allergies, as it traps smaller particles like pet dander and mold spores.
- MERV 13: The best choice for superior allergen control, capturing bacteria and other tiny particles.
Crucially, higher isn’t always better. A high-MERV filter can restrict airflow, forcing your system to work harder, which can lead to increased energy use and potential damage. Most residential systems are designed for filters in the MERV 8-11 range. Always check your HVAC manual or consult a professional before installing a filter with a MERV 13 rating or higher.
What Do Air Filters Cost?
While prices vary, a quality filter is an affordable investment in your home’s health and your HVAC system’s longevity. Pleated filters often provide the best value, balancing cost with a longer lifespan and better performance. The real savings come from avoiding expensive repairs and lowering energy bills. A clean, basic filter is always better than a clogged, premium one.
When to Replace Your Air Filter: Key Signs and Timelines
As we’ve covered, knowing when to perform an air filter replacement is essential for maintaining your HVAC system and indoor air quality. Pay close attention to visual signs of a dirty filter, any decrease in your system’s performance, and changes in your home’s environment to determine the right replacement schedule for you.
A Simple Guide to HVAC Air Filter Replacement
Replacing your HVAC air filter is a straightforward DIY task that any homeowner can perform in minutes. The process involves turning off the system for safety, removing the old filter, inserting a new one of the correct size with the airflow arrow pointing toward the unit, and then restoring power.
Choosing the Perfect Air Filter for Your Home
Selecting the right air filter is a key part of air filter replacement. It requires balancing filtration needs, indicated by the MERV rating, with your specific HVAC system’s capabilities to ensure optimal airflow and efficiency. For most homes, a pleated filter with a MERV rating between 8 and 11 offers an excellent combination of performance and value.